Making a new head for Farmboy
This short tutorial describes the making of the Asparagorn head.
Step 1 - the Bones
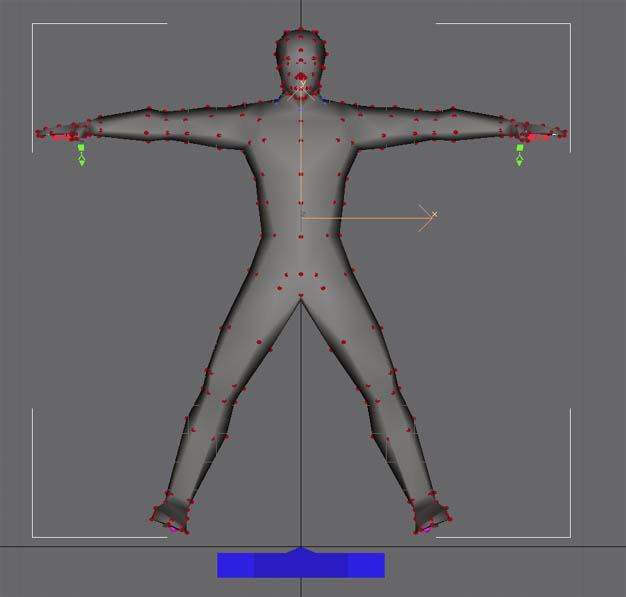 Open the Farmboy unrigged pos-a1 mesh in Siege Max. A head doesn't need
the extras from the rigged mesh, so this is the easiest point to start. Select
only the neck vertices, and then invert the selection.
Open the Farmboy unrigged pos-a1 mesh in Siege Max. A head doesn't need
the extras from the rigged mesh, so this is the easiest point to start. Select
only the neck vertices, and then invert the selection.
 Delete the vertices to leave only those for the neck. You might want to
save the result as a useful starting point for future head projects.
Delete the vertices to leave only those for the neck. You might want to
save the result as a useful starting point for future head projects.
Step 2 - the new mesh
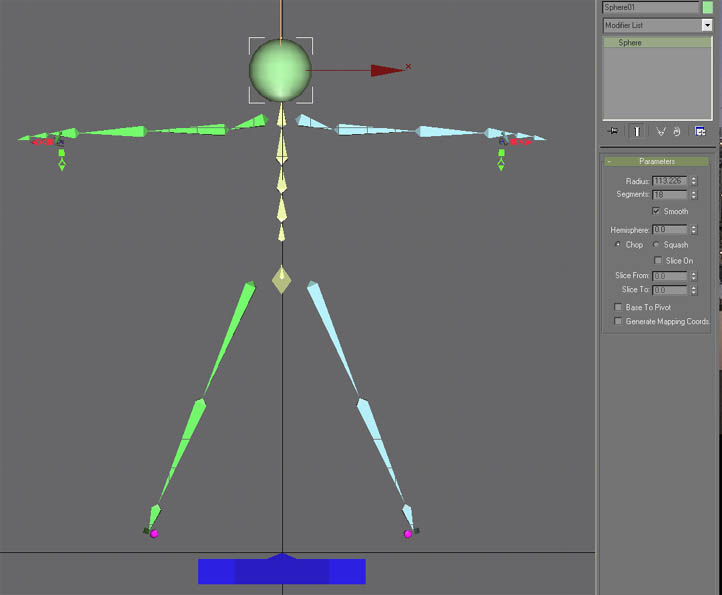 In the top viewport, create a sphere about the right size for a head.
Creating in the top viewport places the axis of the sphere vertically, which
becomes important later. Move the sphere above the neck, so it just hides the
head bone.
In the top viewport, create a sphere about the right size for a head.
Creating in the top viewport places the axis of the sphere vertically, which
becomes important later. Move the sphere above the neck, so it just hides the
head bone.
 Set the number of segments to a multiple of 6. I used 18 for this head.
Convert it to an Editable Mesh.
Set the number of segments to a multiple of 6. I used 18 for this head.
Convert it to an Editable Mesh.
Delete the bottom vertex of the sphere, and then select the skinmesh, which is easiest done from the object menu, as it has no faces to see in the viewports. Attach the sphere to the skinmesh.
Use the Target weld to connect the lowest row of vertices to the original neck vertices. Drag each one down to its nearest neck vertex. In my case, there were three vertices for each neck vertex.
Step 3 - Shaping and Mapping
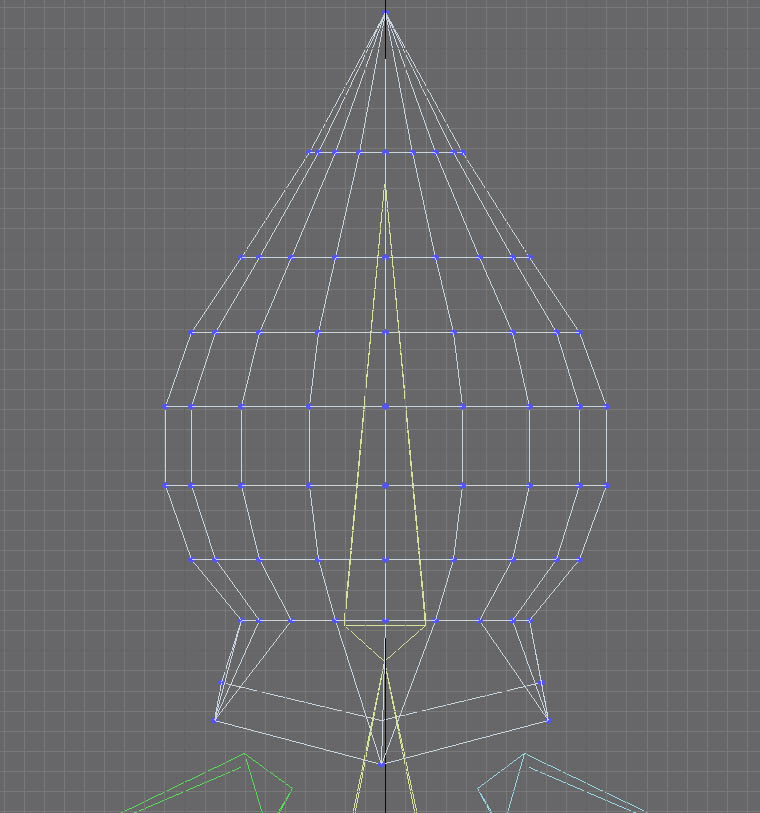 Pull up some vertices to shape the basic head and ears of the character.
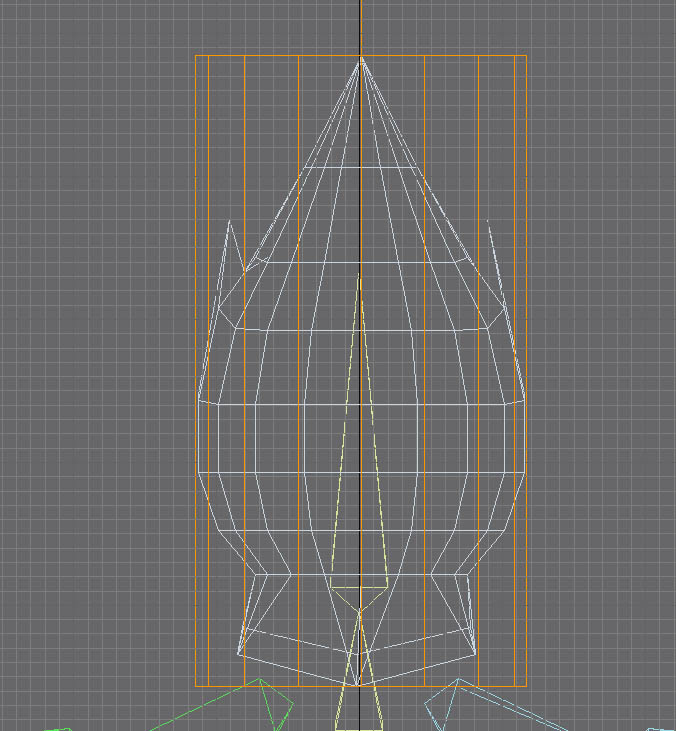 Once you have a reasonable shape, add a UV Map (cylindrical)
modifier to the stack, just after the Editable mesh.
Once you have a reasonable shape, add a UV Map (cylindrical)
modifier to the stack, just after the Editable mesh.
Step 4 - Painting a face
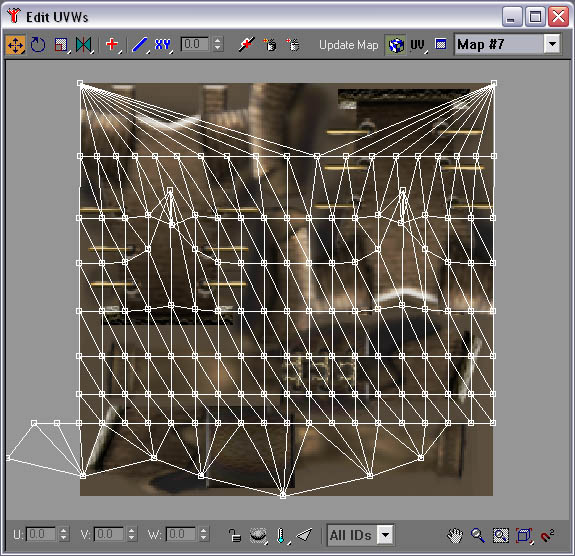 Add an Unwrap UVW modifier after the UV map one and click on Edit.
 Select the right half of the points and mirror them, then move them to
coincide with the left half.
Select the right half of the points and mirror them, then move them to
coincide with the left half.
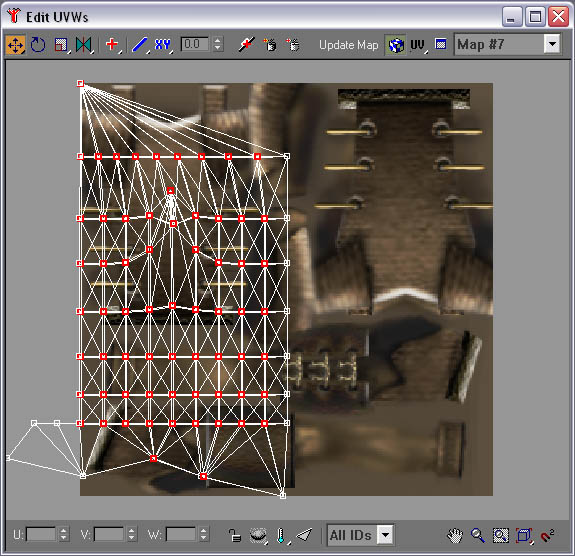
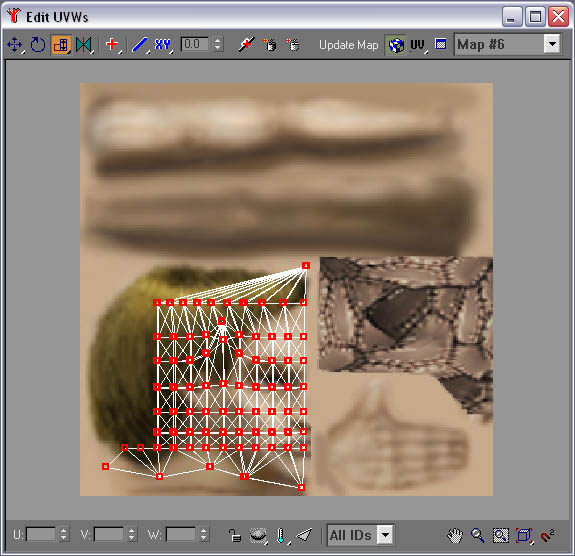 Finally switch to the face bitmap and scale the whole thing to fit in the
lower left where the face is on the bitmap.
Finally switch to the face bitmap and scale the whole thing to fit in the
lower left where the face is on the bitmap.
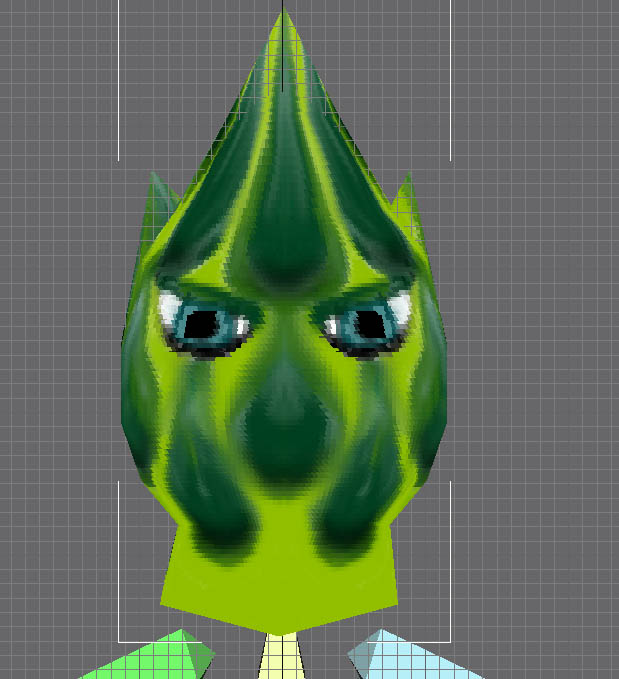 You can now fire up Photoshop, or Paint Shop Pro, or whatever you have and
paint a new bitmap for the new head.
You can now fire up Photoshop, or Paint Shop Pro, or whatever you have and
paint a new bitmap for the new head.
Step 5 - Weights and stitches
 Click on the skin modifier, and select Add Bones.
You want to add all the bones except Bip01_DUMMY,
weapon_grip, shield_grip,
and the left and right foot pins. Either add them all and then remove those,
or unselect them in the Add Bones dialog.
Click on the skin modifier, and select Add Bones.
You want to add all the bones except Bip01_DUMMY,
weapon_grip, shield_grip,
and the left and right foot pins. Either add them all and then remove those,
or unselect them in the Add Bones dialog.
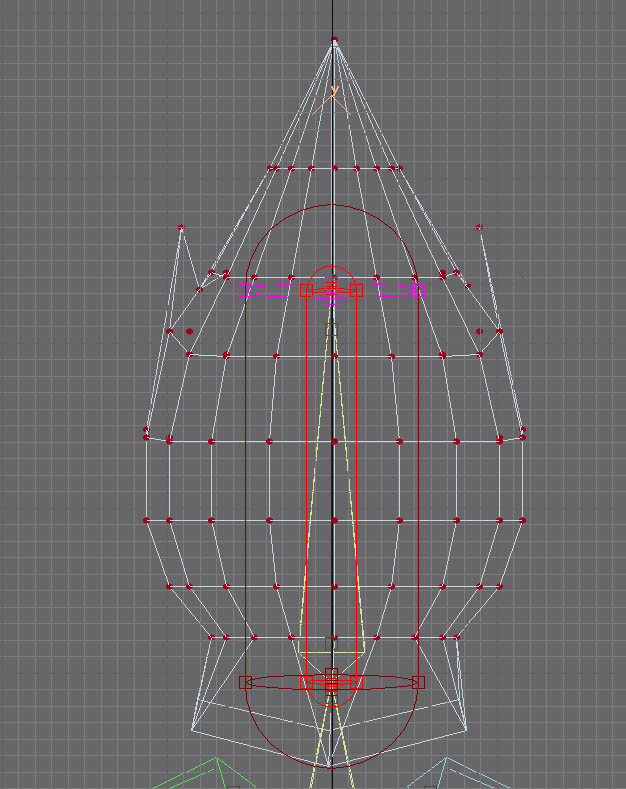
Click on Edit Envelopes and select the Bip01_head bone. Check the vertices checkbox in the Filters section of the rollout, and select all the vertices except the neck. Type a "1" in the Abs Effect field.
Select the Bip01_neck bone and do the same for the other vertices.
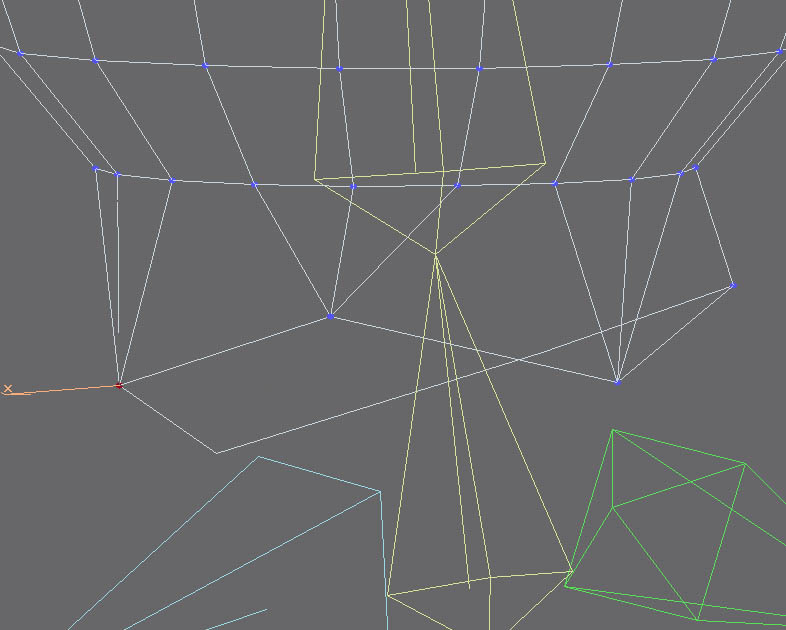
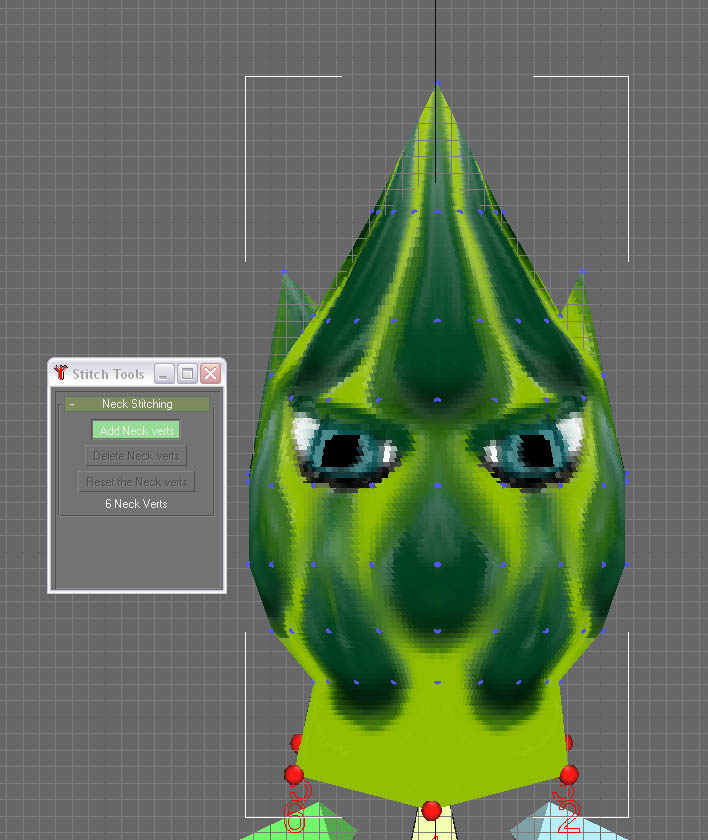 The final parts of the construction use the ASP modifier. Make sure there are
no head, foot, or hand faces in the Aspect Tool, then open the Neck Stitching dialog
and set the neck vertices as shown.
The final parts of the construction use the ASP modifier. Make sure there are
no head, foot, or hand faces in the Aspect Tool, then open the Neck Stitching dialog
and set the neck vertices as shown.
Vertex 4 is out of sight at the back of the neck, don't forget it!
Step 6 - Gas
The new head has to be added to a number of gas files in world\global\skins which is part of the Logic.dsres file. Untank them into your Bits folder to work on.
Heads.gas needs an extra entry to allow you to pick the new head for Farmboy.
[heads]
{
	[farmgirl]
	{
		* = default;
		* = m_c_gah_fg_hlmt_head-02;
		* = m_c_gah_fg_hlmt_head-03;
		* = m_c_gah_fg_hlmt_head-04;
		* = m_c_gah_fg_hlmt_head-05;
	}
	[farmboy]
	{
		* = default;
		* = m_c_gah_fb_hlmt_head-02;
		* = m_c_gah_fb_hlmt_head-03;
		* = m_c_gah_fb_hlmt_head-04;
		* = m_c_gah_fb_hlmt_head-05;
		* = m_c_gah_fb_hlmt_head-asparagorn;
	}
	[dwarf]
	{
		* = default;
	}
	[skeleton_good]
	{
		* = default;
	}
}
The skin you painted has to be added to the faces.gas file.
[faces]
{
	[farmboy]
	{
		* = b_c_gah_fb_skin_001;
		* = b_c_gah_fb_skin_002;
		* = b_c_gah_fb_skin_003;
		* = b_c_gah_fb_skin_004;
		* = b_c_gah_fb_skin_005;
		* = b_c_gah_fb_skin_006;
		* = b_c_gah_fb_skin_007;
		* = b_c_gah_fb_skin_008;
		* = b_c_gah_fb_skin_009;
		* = b_c_gah_fb_skin_010;
		* = b_c_gah_fb_skin_asparagorn;
	}
	[farmgirl]
	{
But there's more to do! You don't want the bitmap for the skin to be overlaid with hair, so you need to prevent that by editing two more gas files.
Hairtoheads.gas specifies which hair can be used with which head. You don't want any hair, so you need to add an entry pointing to a new "hair".
[hairtoheads]
{
  [farmboy]
  {
    b_c_gah_fb_hair_001 = default,m_c_gah_fb_hlmt_head-02,m_c_gah_fb_hlmt_head-03;
    b_c_gah_fb_hair_002 = default,m_c_gah_fb_hlmt_head-02,m_c_gah_fb_hlmt_head-03;
    b_c_gah_fb_hair_003 = default,m_c_gah_fb_hlmt_head-02,m_c_gah_fb_hlmt_head-03;
    b_c_gah_fb_hair_004 = default,m_c_gah_fb_hlmt_head-02,m_c_gah_fb_hlmt_head-03;
    b_c_gah_fb_hair_005 = default,m_c_gah_fb_hlmt_head-02,m_c_gah_fb_hlmt_head-03;
    b_c_gah_fb_hair_006 = default,m_c_gah_fb_hlmt_head-02,m_c_gah_fb_hlmt_head-03;
    b_c_gah_fb_hair_007 = default,m_c_gah_fb_hlmt_head-04,m_c_gah_fb_hlmt_head-05;
    b_c_gah_fb_hair_008 = default,m_c_gah_fb_hlmt_head-04,m_c_gah_fb_hlmt_head-05;
    b_c_gah_fb_hair_009 = default,m_c_gah_fb_hlmt_head-04,m_c_gah_fb_hlmt_head-05;
    b_c_gah_fb_hair_010 = default,m_c_gah_fb_hlmt_head-04,m_c_gah_fb_hlmt_head-05;
    b_c_gah_fb_hair_099 = m_c_gah_fb_hlmt_head-asparagorn;
  }
}
The hair also needs to be declared in hair.gas
[hair]
{
	[farmboy]
	{
		* = b_c_gah_fb_hair_001;
		* = b_c_gah_fb_hair_002;
		* = b_c_gah_fb_hair_003;
		* = b_c_gah_fb_hair_004;
		* = b_c_gah_fb_hair_005;
		* = b_c_gah_fb_hair_006;
		* = b_c_gah_fb_hair_007;
		* = b_c_gah_fb_hair_008;
		* = b_c_gah_fb_hair_009;
		* = b_c_gah_fb_hair_010;
		* = b_c_gah_fb_hair_099;
	}

	[farmgirl]
	{
The hair can be either a completely transparent one, or you can just save another copy of the texture bitmap.
Step 7 - Tank and run
All that remains to do is to test the new head. Start up DSMod and make sure the new head is available for farmboy. Give him a helmet to make sure the skin texture stays on his face. Note that the head inside the helmet will be the original farmboy one, but there's usually not a lot showing, so it shouldn't matter much.

If everything checks out, tank it all up and try him in the full game. Remember to include everything you changed in the dsres, or it won't work. Also note that other mods may replace the same files as you have, so don't expect the new head to work in a modded game.